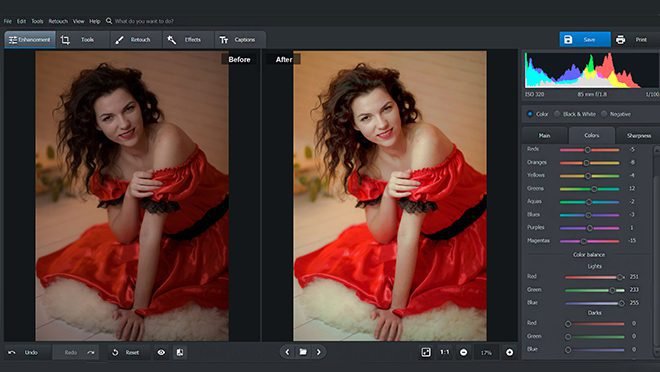
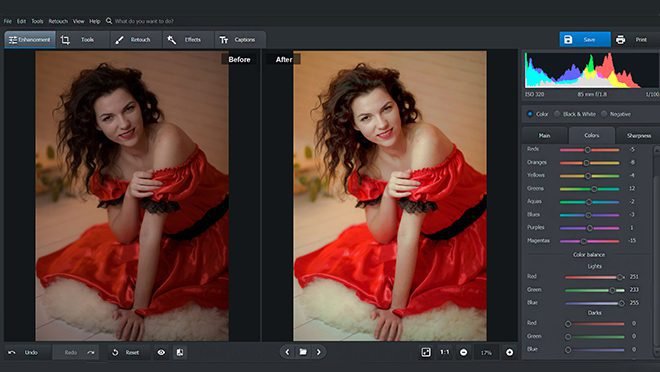
Today, most people take a plethora of images for various purposes. However, these pictures do not always come out sharp and clear due to various factors ranging from bad camera quality to poor camera settings. But you also don’t need to be an expert photo editor to significantly improve the quality of any image you want. Regardless of your skillset, you can now easily enhance a photo in PhotoWorks.
This article will put you through a detailed step-by-step guide of how to enhance a picture in PhotoWorks like a real pro.
Table of Contents
5 Easy methods to enhance pictures using PhotoWorks
1. Adjust the level of exposure
Poor or low lighting is a bane for most photographers. However, in some cases, you cannot help but take images in an area with inadequate lighting. Follow the steps below to adjust the exposure of an overly dark or bright picture.
- Use auto enhancement. Auto enhancements use a smart image editing algorithm to automatically balance the exposure levels on your picture. PhotoWorks will pick out areas or patches with under or overexposure and fix them.
- Manually adjust exposure. You can also use the Exposure slider to manually control the exposure of the picture by sliding it left to darken the picture or right to brighten it.
- Edit specific areas. You can also enhance photos using Shadows and Highlights. The sliders allow you to edit only certain portions of the picture.
- Adjust the white balance. Adjusting the white balance of a dark photo can also help. Adjust the temperature slider to give the picture a warmer tone.

2. Adjust the color balance
You can get really colorful and beautiful pictures by merely tweaking the color balance. Look at our example below to see how much better a photo can look by adjusting the color balance.
- Adjust the entire tone. In the colors tab, you can adjust the saturation (gray colors), hue (actual colors), and luminance level (ratio of black to white) of a photo.
- Work with different objects. You can choose to only adjust the hue of a specific object in the photo. Go to saturation and move any of the sliders to edit only a particular color.
- Tweak the Tone Mapping. You can use Tone Mapping to add more exposure and improve the picture’s color balance. Select your preferred color for optimum results and adjust the overlay blend mode.


3. Enhance sharpness
A dim, blurred, or dull-looking photo can take away all the beauty in a picture. Learn how to enhance an image so that it comes out very sharp and clear.
- Zoom in. Before you start anything, it is essential to zoom into the photo to get a clearer and better look.
- Increase sharpness. Now, navigate to the Sharpness tab and move the slider until you reach your preferred sharpness.
- Make the picture look real. You can also adjust the Threshold and radius settings to get a more natural look.


4. Crop the image
It isn’t always easy to enhance a picture that has too many unwanted objects or activities in the background. If you cannot create the perfect background while shooting, then you can still make your pictures stand out by cropping it.
- Enhance the picture with cropping. Find tools in the upper toolbar and select the Crop tool.
- Choose an aspect ratio. There are up to seven aspect ratios to pick from. Choose your preferred size for the picture.
- Select the right grid overlay. Choosing the ideal grid overlay will ensure that no important bits of your picture are left out. Also, the position of the grid lines can help you position your images better.


5. Remove unwanted objects
You can also enhance a photo by getting rid of any unwanted objects or people in the background. With this tool, you can remove any distracting or unwanted images from your picture.
- Pick the Clone Stamp. Go to the Tools tab and select the Clone Stamp.
- Choose a different brush size. Adjust the size of your brush to be just a little bigger than the object you want to remove.
- Use pixels from a uniform area. Now, you can copy and paste the pixel surrounding the image to replace where the unwanted image occupies.


Photography lovers and experts are not in short supply of photo editing tools and software. There are bound to be more sophisticated, complex, and versatile photo editing tools out there to help and show you how to enhance a photo. However, none of them offers Automatic Photo Editing, portrait enhancement, Face sculpting features, and lots more in a user-friendly interface that requires no experience or skill to use to professionally enhance pictures.


