As a game lover, you may always wish to record your gameplay to share with others when you are hooked on a brand new game for Windows/Mac. Or you just want to capture a game clip to guide newbies on how to play the game. Then the first thing you need is a screen recorder.
In this article, I will walk you through three ways of recording video games on Windows and Mac. Read on and find the one that can meet your needs.
- Use Game Recorder for PC & Mac
- Game Bar on Windows 10
- Screenshot Toolbar on macOS
Table of Contents
Use game recorder for PC & Mac
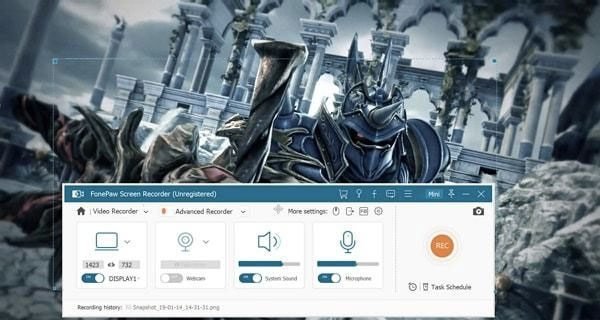
If you are searching for a professional screen recorder to capture your gameplay on your Windows or Mac computer, you are in the right place. FonePaw Screen Recorder helps you record gameplay easily with powerful features.
With this program, you can capture any type of video games and record screen and audio together from both systems and Microphones. By using hardware acceleration, you can enjoy a faster and smoother recording and your gaming experience will not be affected during the recording. It supports recording full screen or a selected portion.

Some other powerful features of this screen recorder are:
- Save your recorded videos into different formats, such as MP4, WMV, AVI, etc.
- Support to create a unique video withdrawing or adding texts, arrows to the recording or screenshot.
- Possible to record webcam videos only or along with screen activity.
- Support scheduled task for live streaming videos.
- Set up hotkeys for a specific operation.
Now free download and install the screen recorder to capture your gameplay.
Step 1: Launch the screen recorder
After installation, run the program. When entering the homepage, select the recording type to get started. Here click Video Recorder.
Step 2: Record your gameplay
Select Full Screen to record the full screen, and to capture a certain part of your game window, click Custom to customize as you like. You can also choose to record only audio or add a webcam. After all, settings, click REC or press the hotkeys you’ve preset to start recording your gameplay.

While recording, the program provides you some features to highlight objects like adding arrow/line/rectangle/text. You can also take a snapshot by clicking the Screenshot button. When the recording is complete, hit the Stop button and save the video.

Step 3: Preview and share
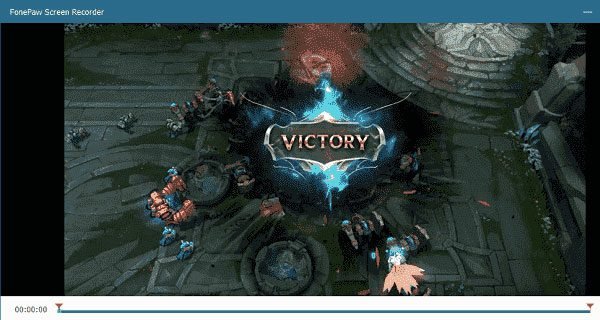
Your recorded gameplay will show on the program, preview it and save it to a certain folder on your computer if satisfied. After that, you can hit Recording History to rename the game clip or share it to Facebook or Twitter as you like.

Game bar on Windows 10
Xbox Game Bar is a free and built-in screen recorder on Windows 10 that can help you capture video games as well as screenshots and broadcast videos while playing games on PC.
- Open the Game Bar
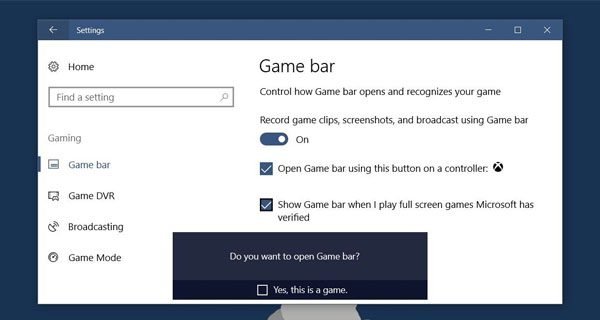
The first thing you need to do is to open the Game Bar. If you haven’t enabled this option, you should go to Start menu > Settings > Gaming > Game Bar to enable it. Then press key combination Windows + G to launch it. You may be prompted to open the Game Bar if Windows thinks that you aren’t playing a video game, click Yes to continue.

Note: To see the Game Bar, you may need to be playing the video games in windowed mode.
- Record Gameplay on Windows 10
To record a video game, click the red Record button and you can see a timer appear at the top-right corner of your screen. Or you can also use the shortcut Windows + Alt + R to begin the recording. To stop recording, bring up the Game Bar again by pressing Windows + G key combination and click the red Stop button.

If you want to take a screen capture while playing games, just click the screenshot icon or press Windows + Alt + PrtSc to take a snapshot of your current game.
- Locate Your Game Clips
You can find all your recorded videos and screenshots in your user account’s Videos > Captures folder. Videos are saved as .mp4 files and screenshots are saved as .png files.
You can also access these files in the Xbox app. Click Start menu > Game DVR, and you can see a list of your captured game clips and screenshots under the portion On this PC. You can view these files within the Xbox app.
Tip: If you need to adjust some recording settings, simply click the Settings button on the Game Bar and select audio, microphone sound, background recording, etc.
Screenshot toolbar on macOS
If you are playing games on Mac, then you can try the screenshot toolbar in macOS Mojave. With the screen toolbar, you can record video games and capture still images of your game window.
If you haven’t upgraded to macOS Mojave, you can record the gameplay with Quick Time Player.
Here’s how to capture your gameplay with screenshot toolbar on Mac:
- Press Shift-Command-5 to bring up the screen-recording menu
- Select Record Entire Screen or Record Selected Portion.
- Click the Record button that appears beside Options to start the recording. If you see a Stop button and timer in the menu bar at the top-right corner on your screen, it indicates the beginning of the recording.
- Click the Options control to change settings like whether to record sound, set a timer or choose where to save your clip.
- When finishing recording, click the Stop button in the Menu bar or press Command + Control + Esc.
- Your video thumbnail will appear on the bottom-right of the screen. You can swipe it to right or click on it to edit your recorded video. To trim your game clip, click the Trim icon and move the yellow sliders to select the part to keep, then click Done to save your gameplay. You can also share it by clicking the Share button.
Game Bar in Windows 10 and screen toolbar on macOS can help you record gameplay, but they don’t have advanced functions for enhancing and sharing your recorded game clips. Therefore, choosing a professional and powerful screen recorder like FonePaw Screen Recorder would be a better choice for you.