Are you looking for the best WiFi analyzer app in order to readily maximize or increase WiFi connectivity on your preferred network? If you are looking for the perfect tool that will assist you in troubleshooting bad signal dropouts and WiFi connections, then you are at the right place.
Signal fluctuation is an incredibly common occurrence when it comes to WiFi. And the #1 reason for these signal fluctuations is due to the constantly changing external conditions. You have likely experienced this; some days, you can browse smoothly without any hitch or disconnection. But on some days, staying online is a struggle.
And this is even more worrisome if you don’t have the tools that will help you to readily diagnose the problem so that you can find the right solution to it.
This is where a WiFi analyzer application comes in handy. This remarkable tool breaks down information right from the access points on your favorite network and places everything into a single screen.
Table of Contents
What is a WiFi analyzer?
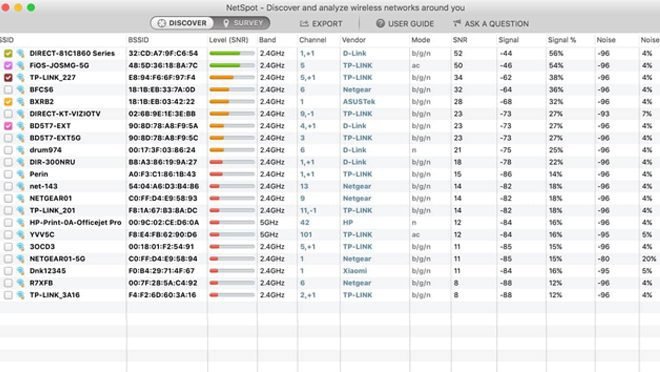
So, what is a WiFi analyzer? A WiFi analyzer is a tool that instantly generates visual displays of the network data of the channels in your environment. The application turns your mobile device or computer into an analytics program, enabling you to quickly identify what you should do or need to do to maximize your network.
For instance, some WiFi analyzer applications allow users to look at several other channels on your network. You will end up being able to quickly identify whether or not they are faster than your own channel.

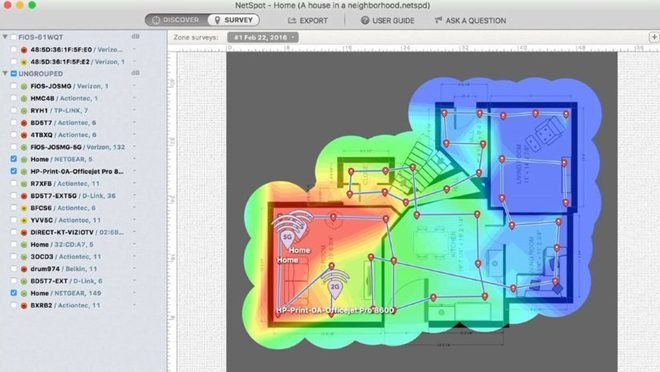
Some WiFi analyzer providers even allow users to perfectly draw up the heat maps of signal distribution in your office or house in order to help them find the best location to position their routers.
Why do you need a WiFi analyzer?
The primary reason you should obtain and use a WiFi analyzer is to maintain the quality of your connection. WiFi signals are never stable but continuously fluctuate. Your WiFi connection may even be performing impressively well until external factors that affect the weather or something in the network changes. And then, this unexpected factor or factors start to influence or impede the performance of your WiFi.
What can you do with WiFi analyzer?
To troubleshoot a problem, you will need data collection and analysis. You need the source information on the regular operations of your chosen network, as well as the current behavior of the affected system. Without these, every other thing you will be doing will be nothing but guesswork.
If the WiFi distribution around your office or residence is weak, you can use an analyzer to detect this. But WiFi analyzers can be used for other things besides troubleshooting the distribution of signals in your home. You can employ a WiFi analyzer if you want to locate – and make use of – a less congested and perfect channel for browsing.


This is why it is vital to carry out WiFi analysis using a wireless network analyzer so that you can discover the WiFi channels that are least used. You will also find lots of crucial information that is essential for extensive WiFi optimization. This is not a difficult feat to perform as long as you can get your hands on the best WiFi analyzer app.
It is a common occurrence for channels to be shared amongst neighbors, especially if they live in the same neighborhood or apartment. However, when you share the same channel with other devices close by, it results in disconnection, interference, or low connection speeds. In fact, sharing the same channel is the number one reason for poor network connectivity and can only be corrected with the use of a WiFi analyzer.
How to use WiFi analyzer to find the best channel
Wireless networks utilize specific channels that lie within the wireless spectrum. When a channel becomes overcrowded, it results in connectivity issues or decreased bandwidth for your network.
Here’s how you can make use of a WiFi analyzer to find the best channel:


Step 1: When you launch your wireless network analyzer, it opens up immediately in the Channel graph view. But you can switch over to Channel rating view by pressing the ‘Menu Key’ on your Android or smartphone device and then select ‘View.’
Step 2: Then select ‘Channel rating’ from the list of views
Step 3: You can select your wireless network or access point by pressing the location on the screen where you will see the words, ‘Please, tap here to set an AP.’
Step 4: After you have selected your wireless network, a list of channels rated by stars will be presented to you. You will see the channel you are currently using as well as your AP listed at the top of the screen.
Your WiFi analyzer app will readily recommend several other less-congested or less-crowded channels. Be aware that not all routers use 14 channels; some routers only use up to 11 channels.
Some wireless routers are designed to auto-scan channels in order to pick the best one, which is usually less crowded. However, if your wireless router does not auto-scan or can’t do it very well, you can manually reset the channel.
Make use of your wireless network analyzer’s Signal Meter to determine the best location for your router. You can walk around your office or home to find out whether or not the wireless signal reaches those areas and make the necessary adjustments.
Conclusion
WiFi analysis is not daunting, especially if you can get your hands on the innovative WiFi analyzer application such as NetSpot. Use this tool extensively and start enjoying a seamless browsing experience and a significant reduction in connection drops or slowdowns.